CHANGES
Version 29.6 (awaiting release)
• New option to prevent font ligatures inside text (enabled by default).
OVERVIEW
Print Edit WE provides facilities to edit the contents of a web page prior to printing or saving as HTML or PDF. Elements in the web page can be formatted, hidden or deleted and text can be edited or inserted. Unwanted content, such as adverts and sidebars, can easily be removed.
Note, to use the Save As HTML feature, the Save Page WE extension (version 14.0 or later) must be installed and enabled.
BASIC OPERATION
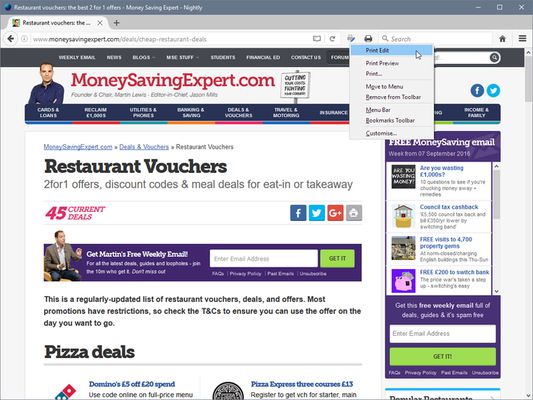
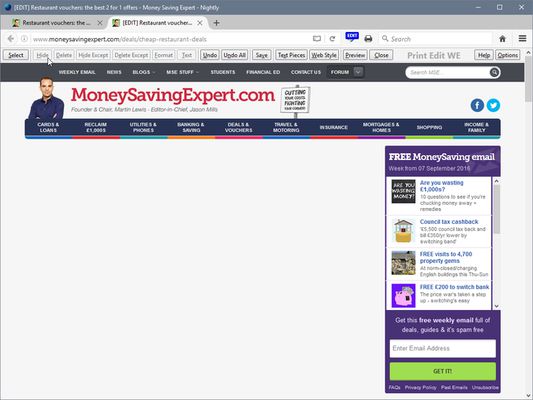
To start editing the page, click on the Print Edit WE button on the main toolbar, or select Print Edit WE > Start Editing on the context menu. A blue 'EDIT' (editing) badge will appear on the button.
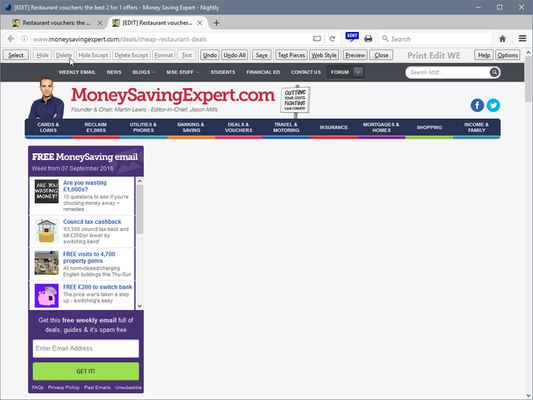
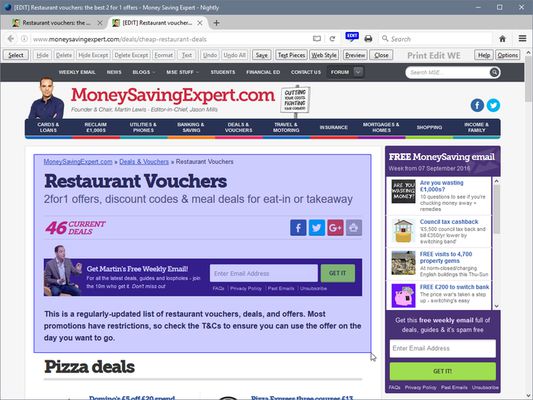
The 'Web Style' feature is disabled by default, so that the page displayed looks similar to how the page would look if printed normally. When the 'Web Style' feature is enabled, the page displayed will look similar to how the page looks during normal browsing.
The 'Text Pieces' feature is disabled by default, so that only whole blocks of text can be selected. When the 'Text Pieces' feature is enabled, individual pieces of text can be selected and edited and line breaks are displayed.
The 'View More' feature is disabled by default, so that only elements that are normally visible are displayed. When the 'View More' feature is enabled, elements that are normally invisible are also displayed and can be selected and edited.
An edited web page can be saved as a single HTML file, which can be viewed or re-edited using Firefox or Chrome. An edited web page can also be saved as a PDF file.
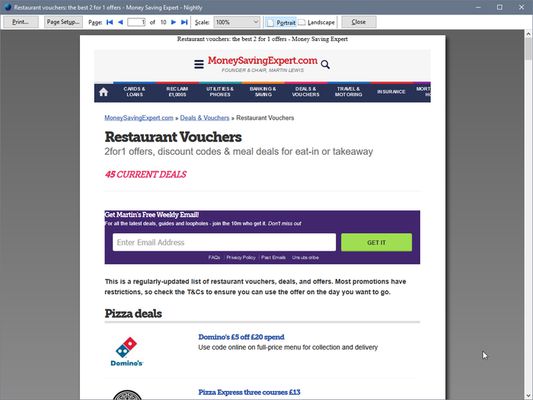
Click the 'Preview' button to see how the edited web page will look when printed. Close the preview window to return to editing.
There are options to:
• default to enabling display with View More at start.
• default to enabling selection of Text Pieces at start.
• default to enabling display with Web Style at start.
• automatically delete graphics at start.
• change visibility of link URLs (show or hide).
• automatically close Print Edit WE after exiting Preview.
• not ask the user about saving edits when closing an edited web page.
• ask the user about leaving an edited web page only if the edits are not saved.
OPTIONS PAGE
The Print Edit WE Options page can be accessed as follows:
• Firefox - On the menu bar select Tools > Add-ons (or press Ctrl+Shift+A), select the Extensions tab, and then click on the Options button.
• Chrome - Right-click on the toolbar button, and then select Options.
TOOLBAR BUTTON
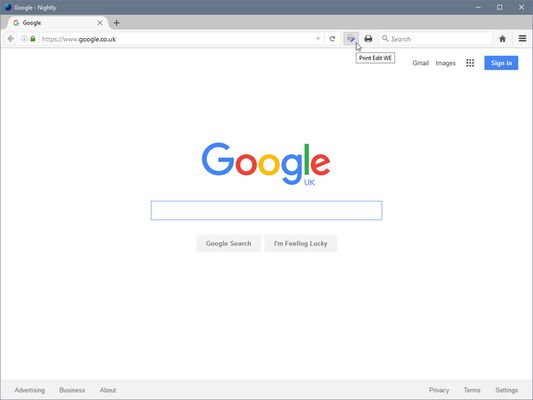
After installation of Print Edit WE, there will be a new grey and blue 'printer-pencil' button on the main toolbar.
If Print Edit WE cannot be used with the current page, the toolbar button will be disabled (greyed-out).
To start editing the page, click on the Print Edit WE toolbar button and a blue editing 'Edit' (editing) badge will appear.
To suspend editing, click on the Print Edit WE toolbar button again, and a red 'Sus' (suspended) badge will appear. To resume editing, click on the Print Edit WE toolbar button again.
There is an option to double-click on the toolbar button to close editing.
CONTEXT MENU & BUTTON MENU
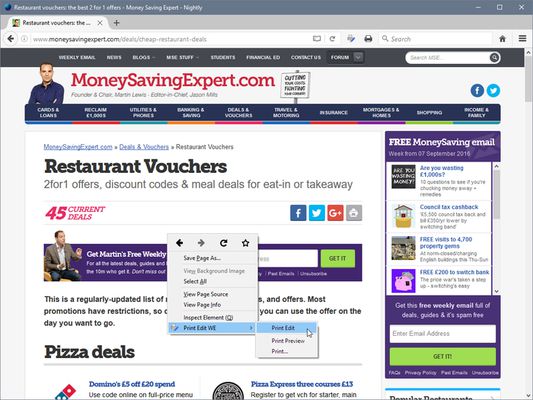
To start editing the page, right-click on the page contents to open the context menu, select the Print Edit WE sub-menu, and then select the 'Start Editing' menu item.
To suspend or resume editing of the page, right-click on the page contents to open the context menu, select the Print Edit WE sub-menu, and then select the 'Suspend Editing' or 'Resume Editing' menu item.
As an alternative to using the context menu, right-click on the Print Edit WE toolbar button and use the button menu.
There is an option to show/hide the Print Edit WE submenu item on the context menu.
PRINT EDIT WE TOOLBAR
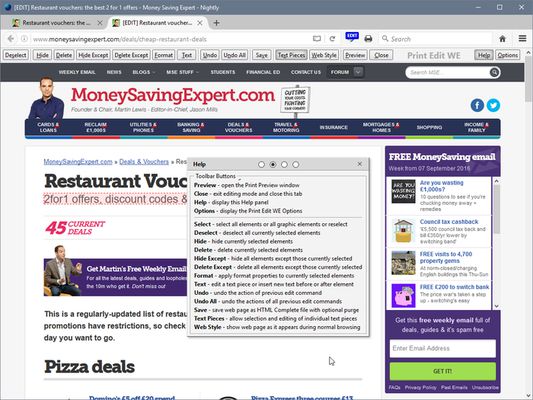
The buttons available on the Print Edit WE toolbar are:
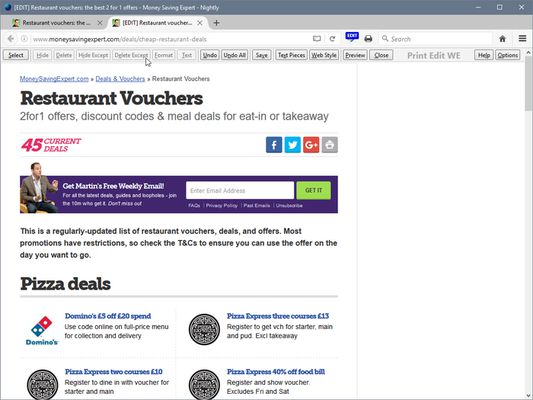
• Select - select all or graphic or page-break elements, or re-select elements from previous command.
• Deselect - deselect all currently selected elements.
• Hide - hide currently selected elements.
• Delete - delete currently selected elements.
• Hide Except - hide all elements except those currently selected.
• Delete Except - delete all elements except those currently selected, with varying restrictions.
• Format - apply format properties to currently selected elements.
• Text - edit a text piece or insert new text before or after element.
• Undo - undo the action of previous edit command.
• Undo All - undo the actions of all previous edit commands.
• Save - save web page as a single HTML or PDF file.
• Text Pieces - allow selection and editing of individual text pieces.
• View More - view invisible elements in the page.
• Web Style - alternately remove or apply CSS print stylesheets.
• Preview - open the Print Preview window.
• Close - finish editing.
• Tools - access to the Fix Page Breaks features and to the Options dialog.
• Help - show the Help panel.
The Delete Except button has three menu items:
• Restricted - higher level elements retain their size and relative position.
• Without Float - higher level elements retain their size and relative position, but cannot float right.
• Unrestricted - higher level elements are resized and repositioned freely, but cannot float right.
In this context, “higher level elements” means the ancestors (parent, grandparent, etc) of the currently selected elements.
KEYBOARD SHORTCUTS
To initiate Print Edit, press Alt+P. To initiate Print Preview when not editing a web page, press Alt+Shift+P. These shortcuts can be reconfigured in the Shortcuts tab of the Print Edit WE Options page.
Each button or menu item on the Print Edit WE toolbar has a keyboard shortcut, which is the letter that is underlined in the name of the button or menu item.
The other keyboard shortcuts are:
• ] - deselect all elements.
• [ - select previously selected elements.
• # - apply page breaks before selected elements.
• Up - step up to higher level containing element.
• Down - step down to previously highlighted element.
• Left - step backwards to preceding element.
• Right - step forwards to following element.
• Enter - select or deselect highlighted element.
• Insert - hide selected elements.
• Delete - delete selected elements.
• Backspace - undo previous edit command.
• Escape - close panel or menu - or close Print Preview window
• Home - scroll to top of page.
• End - scroll to bottom of page.
• PageUp - scroll up by window height.
• PageDown - scroll down by window height.
• Ctrl+A - select all elements.
• Crtl+P - open Print Preview window.
• Ctrl+S - save web page as a single HTML file.
• Ctrl+Z - undo previous edit command.
MOUSE ACTIONS
The mouse actions are:
• Move - move highlight box to highlight element.
• Click - select or deselect highlighted element.
• Right-Click - inspect format properties for highlighted element.
• Drag - select all elements within capture box.
• Shift+Drag - select all graphic elements within capture box.
• Ctrl+Drag - deselect all elements within capture box.
HIGHLIGHT BOX
The highlight box (solid border) is positioned over an element by moving the mouse over the element. If necessary, the position of the highlight box can be adjusted using the Expand (Up Arrow) and Shrink (Down Arrow) keys. The element is then selected by clicking the mouse or by pressing the Select (Enter) key.
The position of the highlight box can also be adjusted and the element selected using the Expand, Shrink and Select buttons in the Inspect panel.
SELECTING ELEMENTS
An individual element is selected by moving the mouse, so that the highlight box (solid border) is positioned over the element, and then clicking the mouse (or pressing Enter). The highlight box then changes to a selection box (dashed border). Any number of elements can be selected, one after another, before applying an edit command.
Any selected element can be deselected by moving the mouse, so that the highlight box (solid border) is positioned over the selected element, and then clicking the mouse (or pressing Enter). The selection box (dashed border) then disappears.
Multiple elements can be selected together by dragging the mouse to draw a rectangular capture area which encloses the elements. When the mouse is released, all of the elements within the capture area are selected. To select just graphic elements, hold down the Shift key when dragging the mouse.
To deselect multiple elements, hold down the the Ctrl key when dragging the mouse.
If the start point of the capture area is within a <frame> or <iframe>, then the capture area can only be dragged within the boundaries of the <frame> or <iframe>.
All selected elements can be deselected by clicking the Deselect button.
There are options to:
• make elements still selectable after a Hide command.
• reinstate select boxes after an Undo command.
• show wider borders for the highlight and selection boxes.
• shade the background for selection boxes.
• snap the capture box start point to the web page edge.
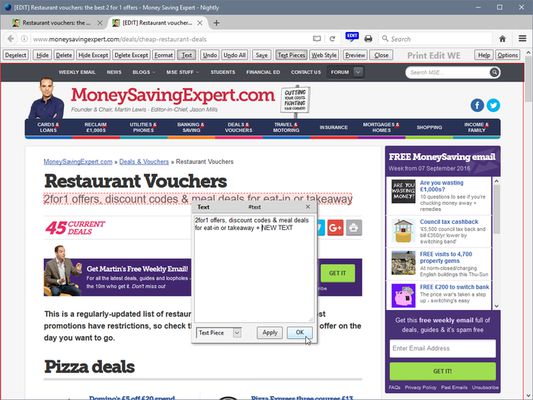
EDITING AND INSERTING TEXT
The Text command allows a selected piece of text to be edited, or new text to be inserted before or after a selected element or selected piece of text. The Text command button is only enabled when a single element or single piece of text is selected.
Normally, an individual piece of text can only be selected if the Text Pieces feature is enabled. However, when the Text Pieces feature is disabled, any individual pieces of text that have been previously edited will remain selectable and editable.
The Text popup panel provides a text box where an existing piece of text can be edited or new text can be prepared before being inserted. All of the standard editing keyboard shortcuts (e.g. arrow keys, Ctrl+C, Ctrl+V) can be used in the text box.
There is an option to show line breaks when the Text Pieces feature is enabled.
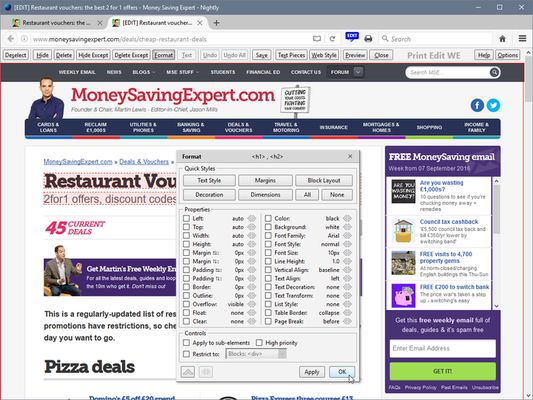
APPLYING FORMAT PROPERTIES
The Format command allows up to twenty-six format properties to be applied to the selected elements. These format properties affect both the layout of the content and its appearance, and can be used to reduce the space that the content occupies on the printed page and to improve its readability.
The format properties can be applied individually by ticking the checkboxes in the Properties section, or in groups by using the buttons in the Quick Styles section. The value of a format property can be changed by clicking the small arrow buttons next to the property value. Click on the property value to reset it to the default value.
The Properties section can be shown or hidden by clicking the Show/Hide Properties (down/up chevron) button. The values of all of the format properties can be reset to their default values by clicking the Reset Properties (arrows target) button.
The format properties can be applied to the selected elements or to the selected elements and their nested sub-elements. The format properties can be restricted (Only or Except) to specific content types (e.g. Blocks or List Items). The Format command can be applied multiple times to the same element.
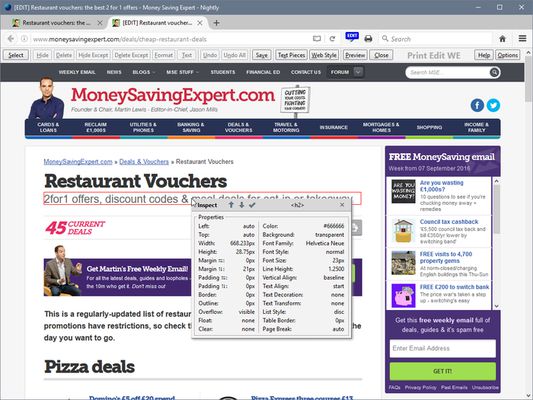
INSPECTING FORMAT PROPERTIES
The current format properties for an element can be displayed in the Inspect popup panel. This is displayed by moving the mouse, so that the highlight box (solid border) is positioned over the element, and then right-clicking the mouse.
The Inspect panel has five buttons (Expand, Shrink, Backwards, Forwards and Select) which allow positioning of the highlight box and selection of the highlighted element.
There is an option to allow the Inspect panel to be opened when the Format panel is open.
ADJUSTING PAGE BREAKS
Page breaks can be applied or avoided using the 'Page Break' property in the Format panel.
Page breaks can also be applied using the 'Page Break Before' button in the Format panel or using the hash (#) keyboard shortcut.
All elements with the 'Page Break' property set can be selected using the 'Select Page Breaks' menu item.
There is an option to default to avoid page breaks inside images.
SAVING AS HTML FILE
The Save As HTML menu item allows an edited web page to be saved as a single HTML file (including styling, images and fonts) that can be opened and re-edited in Firefox or Chrome.
There is an option to choose the save action:
• Save Basic Items
• Save Standard Items
• Save Custom Items
Note, to use the Save As HTML feature, the Save Page WE extension (version 14.0 or later) must be installed and enabled.
There are options in Save Page WE to specify which items are saved and to purge elements that have been hidden.
Please refer to the Save Page WE documentation for more information: https://addons.mozilla.org/en-GB/firefox/addon/save-page-we/
SAVING AS PDF FILE
The Save As PDF menu item allows an edited web page to be saved as a PDF file. This feature is available with Firefox 56 or later on Windows or Linux, and with Firefox 81 or later on Mac OS X.
The Save As PDF popup panel allows fast configuration of paper size, orientation, scale and background prior to saving the edited web page as a PDF file.
There are options to configure the paper size, orientation, scale, background, content margins, header/footer margins and header/footer fields for the saved PDF file.
The page title, page URL, page numbers, date and time, etc can be inserted into the header/footer fields using the following codes:
• &T - Page Title
• &U - Page URL
• &D - Date and Time
• &P - Page Number
• &PT - Page Number and Total Pages
There are options to specify the saved file name using text or predefined fields and to replace spaces with a user-defined character.
The saved file name may contain the following predefined fields:
• %TITLE% - the document title or if this is empty the same as %FILE%.
• �TE(x)% - the current date in YYYYxMMxDD format, where 'x' is any character or can be omitted.
• %TIME(x)% - the current time in HHxMMxSS format, where 'x' is any character or can be omitted.
• %HOST% - the host name in the page URL.
• %HOSTW% - the same as %HOST%, but without the 'www.' prefix.
• %PATH% - the path in the page URL.
• %PATHW% - the same as %PATH%, but without the '.extension' suffix.
• %FILE% - the file name in the last segment of the path in the page URL.
• %FILEW% - the same as %FILE%, but without the '.extension' suffix.
• %QUERY(p)% - the query string in the page URL if 'p' is omitted, or the value of parameter 'p'.
• %FRAGMENT% - the fragment string in the page URL.
SUPPORT
Please e-mail: dw-dev@gmx.com
LICENSE
Distributed under the GNU General Public License version 2.
See LICENCE.txt file and http://www.gnu.org/licenses/
 Install
- License: GNU General Public License v2.0 or later
- Weekly downloads: 610
- Average daily users: 38787
- Rating: 4.0704/5 of 412 ratings
- Created: 2016-08-22 19:10:36
- Last updated: 2023-07-31 11:23:33
- Homepage:
- Support site and email
- Orig: https://addons.mozilla.org/en-US/firefox/addon/print-edit-we/
- API: printedit-we@DW-dev
![Print Edit WE - Preparing [PREP] - before editing](images/previews/183/183796_thumb.png)
![Print Edit WE - Editing [EDIT] - two elements selected](images/previews/183/183797_thumb.png)
![Print Edit WE - Suspended [SUS] - use 'Print this page' button to preview](images/previews/183/183806_thumb.png)